

In this lesson you’ll learn all the steps to create a bundle on your backend system. If you prefer to see the same information in a video simply click here.
Remember that when you add a bundle to your backend it will also appear on your customer-facing frontend so remember to ensure all information is entered correctly.
Step 1
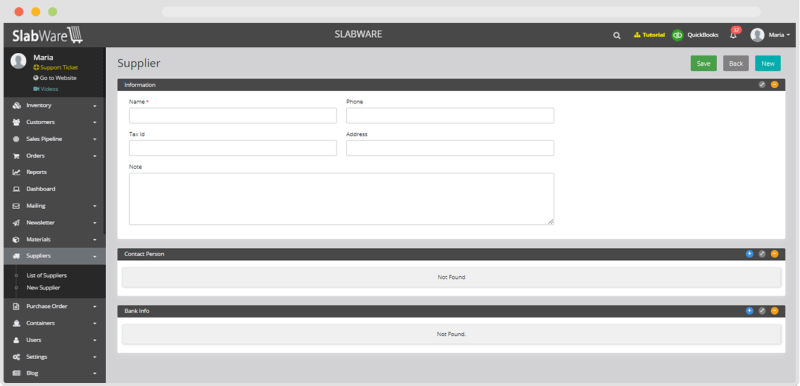
- Note: You’ll only need to complete this initial step if the supplier has not been previously registered
First, you’ll need to register the supplier that you received the material from.
The system can’t create a bundle without a supplier and this way you’ll always have a record of who sold you this material. In addition to better controlling your inventory SlabWare can also use this information in some automatically generated reports.
From the left-side menu select Suppliers -> New Supplier. The only required information is the name of the supplier but you can enter as much information as you like.
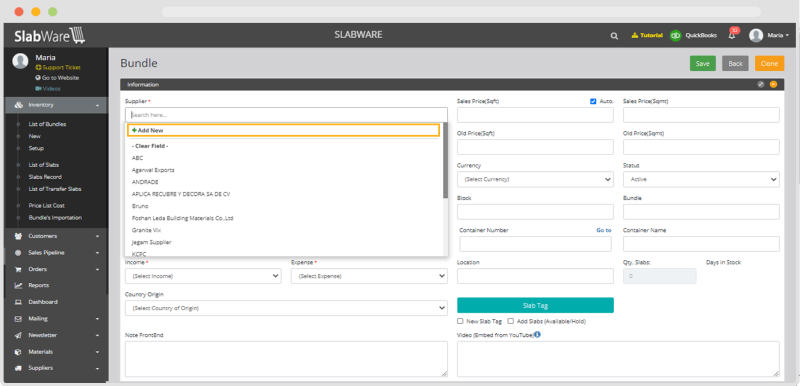
This can be completed from the “Add New Bundle” screen as well: Simply click on “Add New” and enter the supplier’s name in the pop-up box.
Step 2
- Note: You’ll only need to complete this step if the material has not been previously registered.
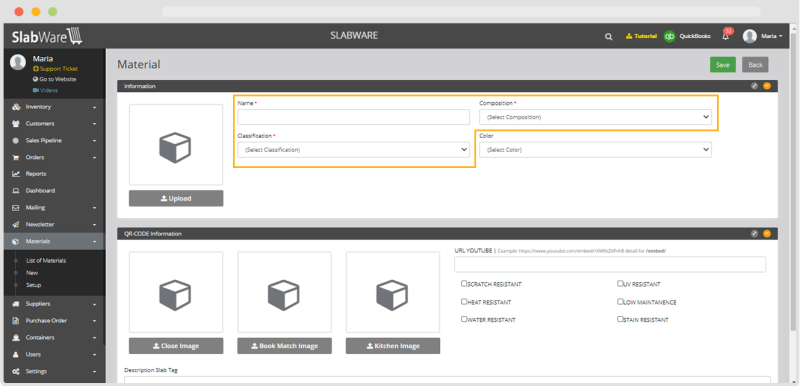
Next, you’ll need to add the material you want to create. To do so, from the left-hand menu select Materials -> New.
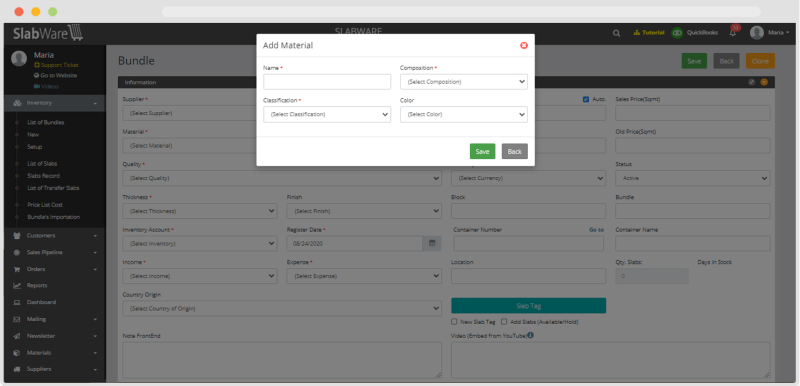
This can be completed from the “Add New Bundle” screen in the same way you saw in step 1.
Important: Materials and Bundles are NOT the same. Material is the color or name (ex Taj Mahal, Alaska White) of the material you’re working with. A bundle is a specific group of slabs of that material (ex. Bundle 14083).
Only three fields are required for creating a new material: Name, classification, and composition. Feel free to complete as many of the other fields as you can to keep your records complete. We recommend uploading a photo here as well.
Step 3
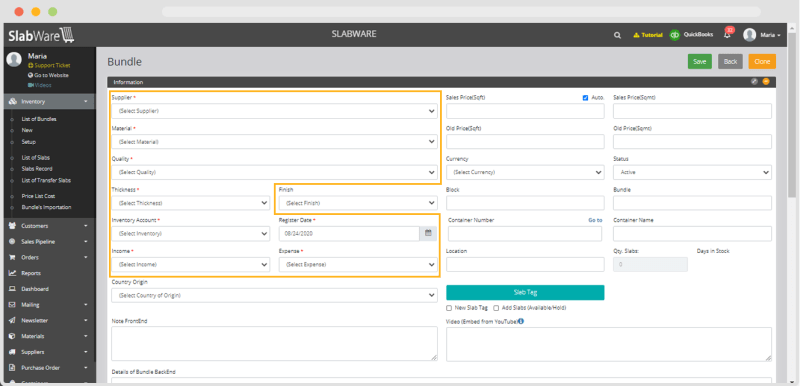
Now you’re ready to create the bundle! Again, from the left-hand menu select Bundles -> New.
Fill in as much information as you can about these bundles. If you’ve previously entered information in these fields you’ll be able to select those from the drop-down menu. If you haven’t set them up you can “Add New” to create the entry and it will be saved for next time.
Possible entries include;
Supplier
Material Name
Quality
Thickness
Inventory Account
Income
Expense
Register Date
Photo
The next step is to add slabs to the new bundle. Just click “Add Slabs” and the system will bring up some boxes for you to fill.
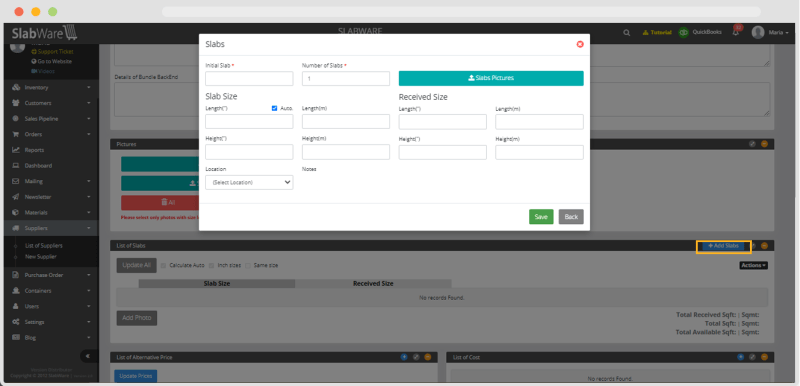
Assign each slab a number (1, 2, 3, etc) and enter the number of slabs in this bundle. You’ll have to enter sizes too. The slabs will initially appear with the same dimensions but you can edit these individually as well.
It’s very important to have the measurements of the slabs as accurate as possible as the system uses these for the Estimate and Draw functions.
And that’s it! All you need to do is click Save and you have a new bundle in your backend (and frontend too!)
Keep reading