
A powerful CRM is the backbone of a high-performing sales team. But before your sales reps start creating opportunities, adding tasks, and closing deals, there is one crucial step: configuring your CRM Setup page.
Setting up your CRM workflow in advance ensures that every deal flows logically from initial inquiry to final payment. It also saves you from the headache of reorganizing stages down the road.
In this quick tutorial, we’ll walk you step-by-step through configuring your Closing Probabilities, Loss Reasons, Sales Stages, and Task Stages in SlabWare.
🛠️ Step 1: Accessing the CRM Setup Page
Log into your SlabWare account.
In the main menu, navigate to CRM.
Click on Setup.
This page controls the fundamental logic for both your Opportunities Board and your Task Board.
📊 Step 2: Configuring Closing Probabilities
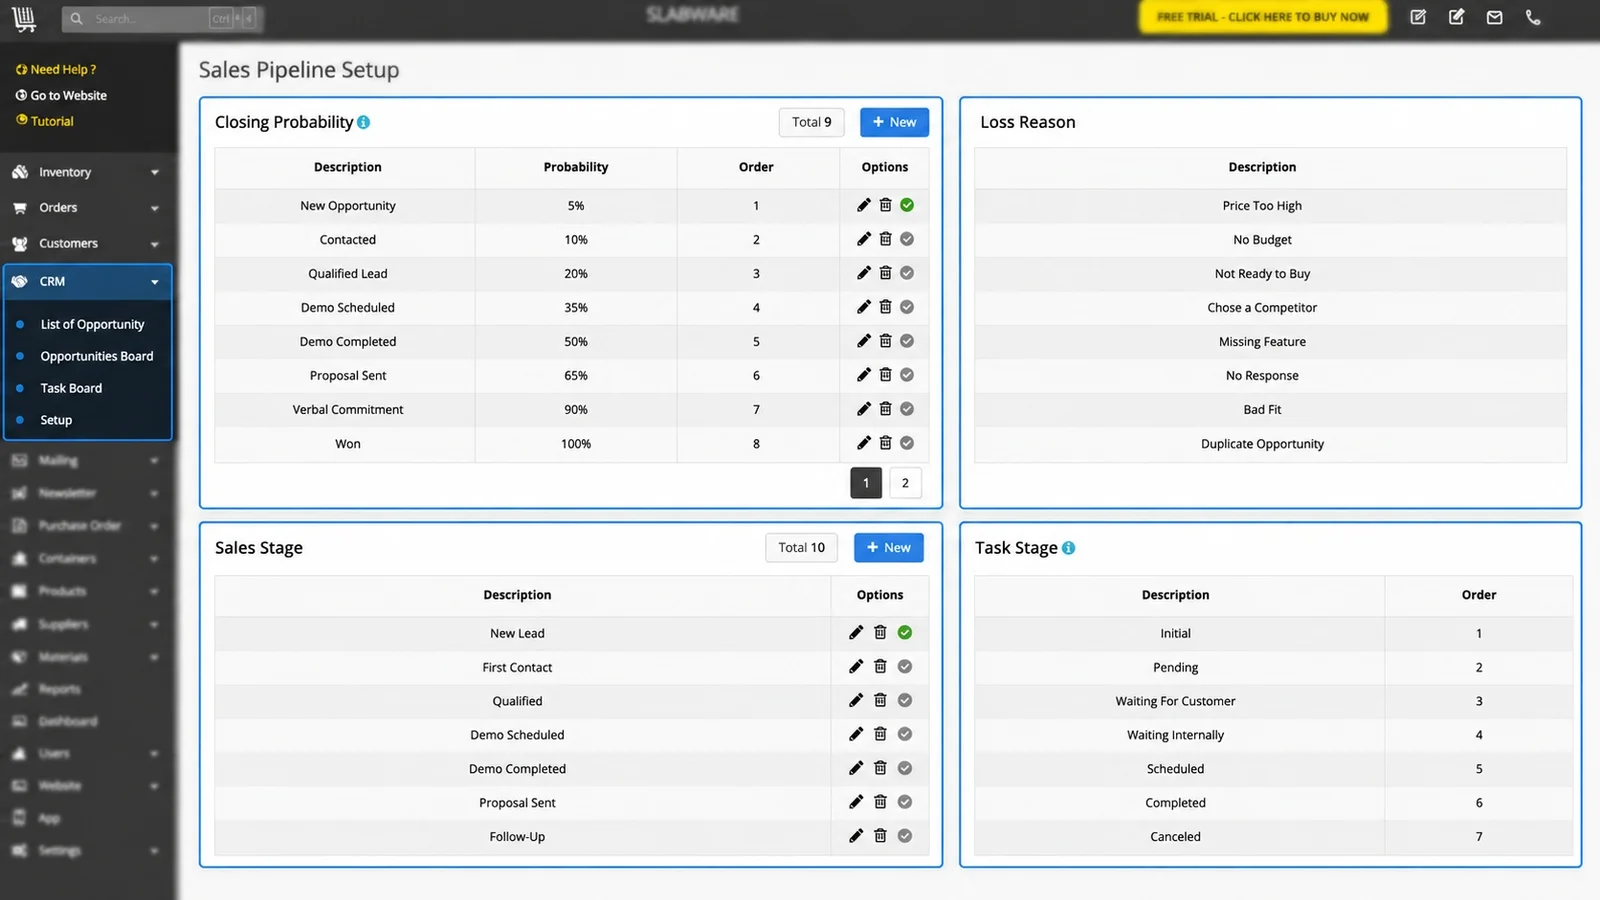
Closing Probabilities define the percentage chance a lead has of closing as they move through your sales pipeline (e.g., New Opportunity = 10%, Proposal Sent = 60%).
Fields to Know:
Description: The name of the probability stage, as in the image shown in the previous section (e.g., New Opportunity, Contacted, Demo Scheduled, etc).
Probability (%): The estimated likelihood of closing the sale at this stage.
Order / Sort: The numerical position where this stage appears on your board.
How to Add a New Closing Probability:
Click + New.
Type in the Description (e.g., Negotiation).
Enter the Probability percentage (e.g., 75%).
Set the Sort position (e.g., Position 7).
Click Save.
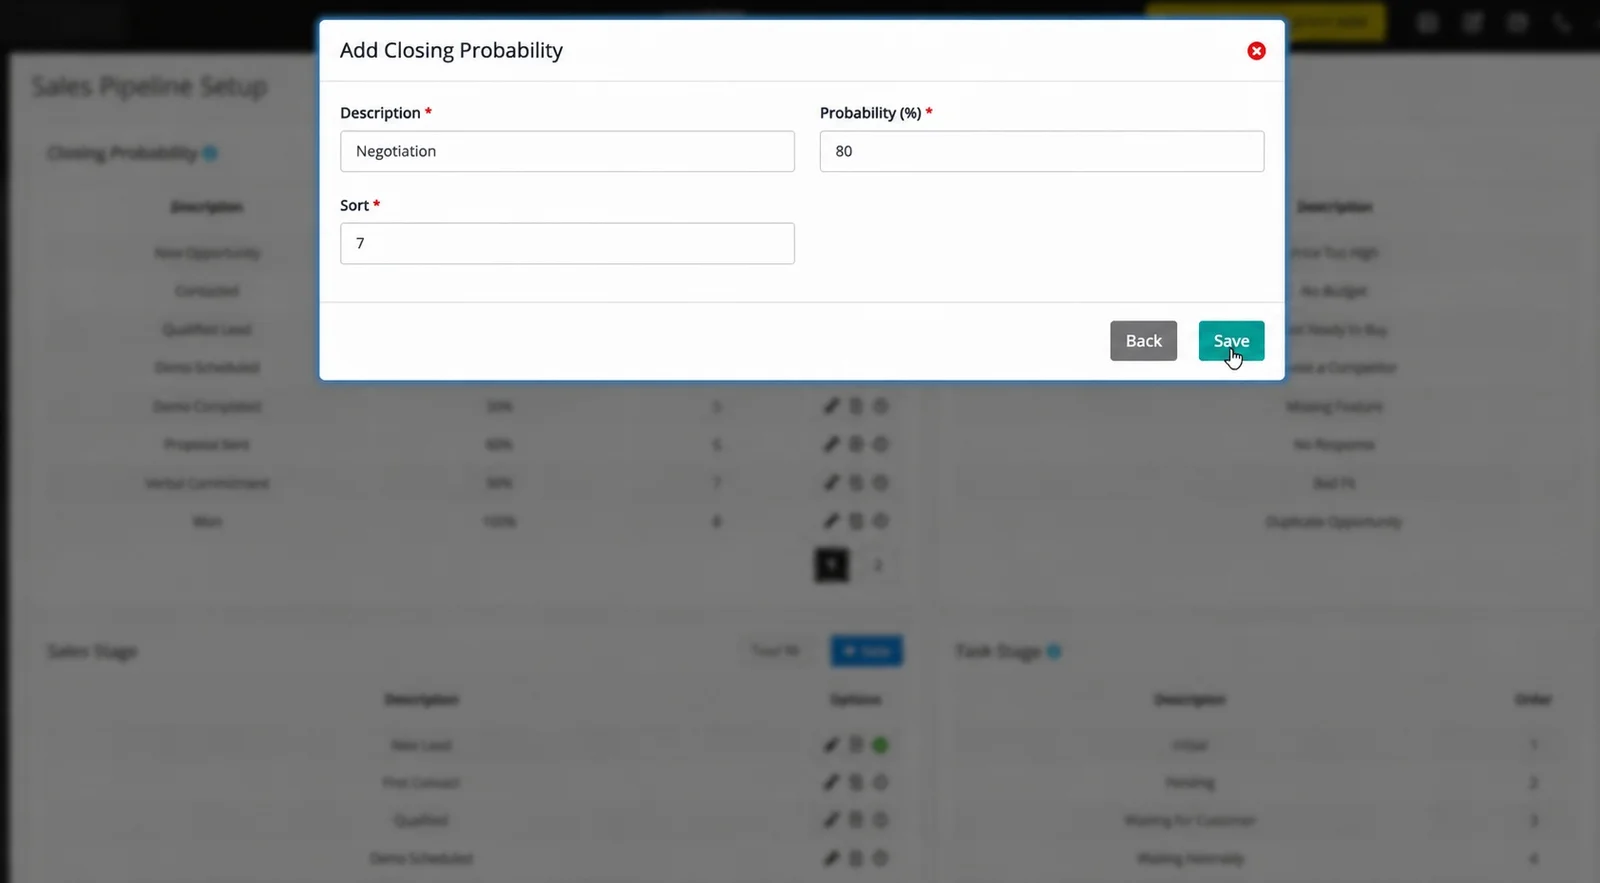
💡 Pro-Tip on Automatic Sorting: If you assign a new stage to Position 7, SlabWare automatically shifts the existing stage at Position 7 down to Position 8, keeping your pipeline neatly ordered without manual adjustments.
Setting Defaults & Editing:
Default Option: The green checkmark indicates the default stage assigned when a new lead is created (typically New Opportunity or Initial). You can change this anytime.
Deleting/Editing: You can edit stages whenever needed. However, if an opportunity is currently active under a specific probability stage, the system won't let you delete it to prevent lost data.
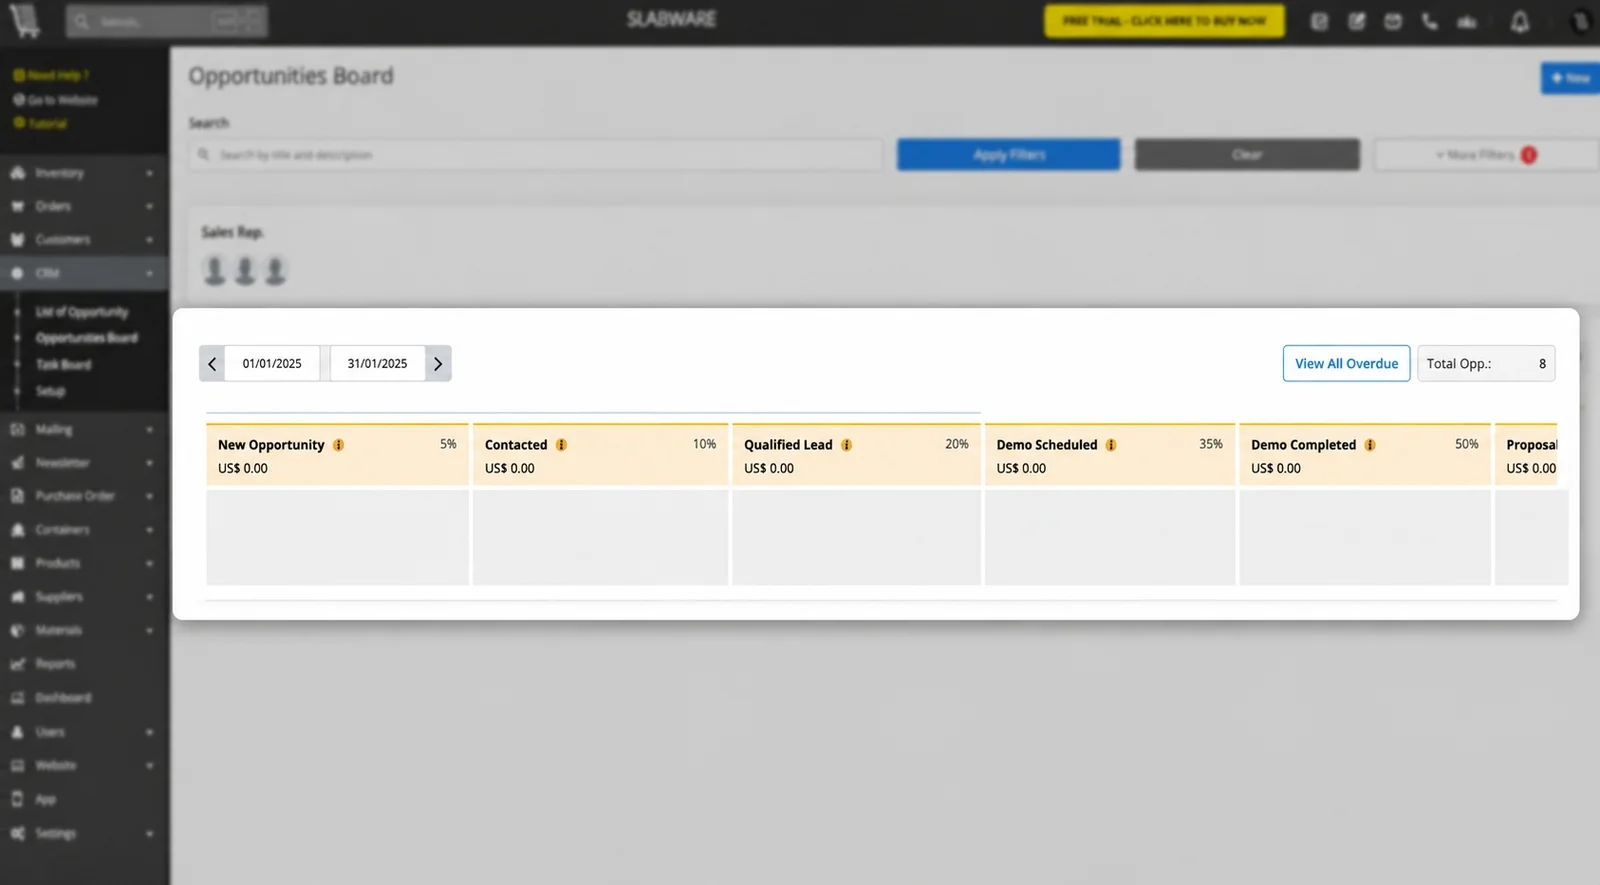
When you go to the board, you’ll see the Opportunities are organized by their Closing Probabilities.
❌ Step 3: Setting Up Loss Reasons
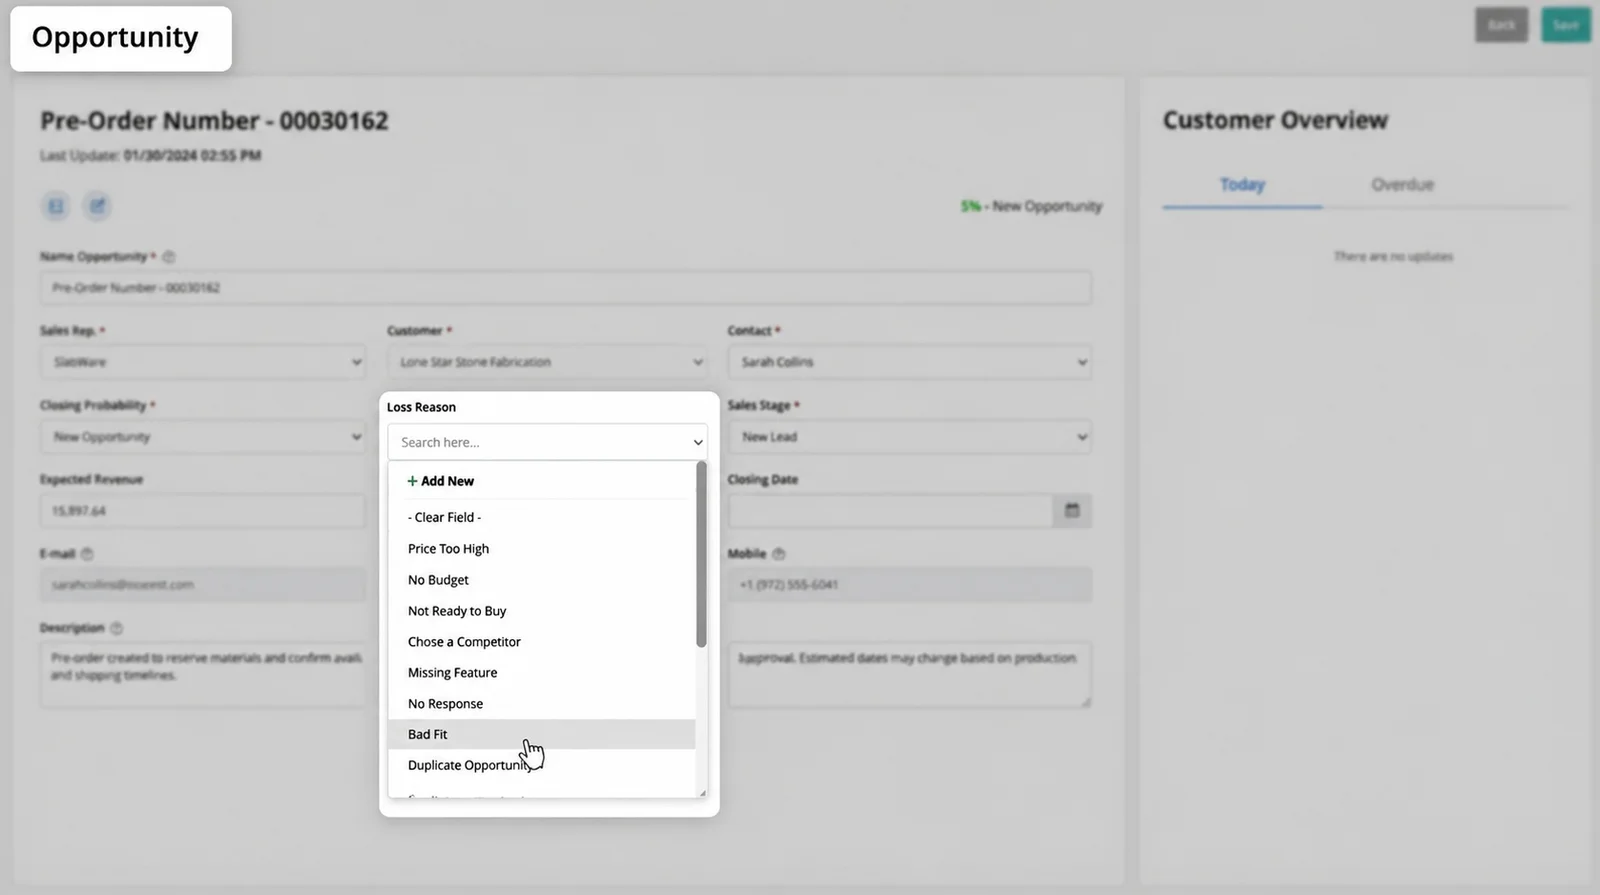
When an opportunity drops off, knowing why is essential for analyzing your sales process. Loss Reasons populate as a dropdown menu inside individual opportunity cards.
Unlike Closing Probabilities, Loss Reasons do not use numerical sorting. They simply display as an easy-to-use list.
When you open an Opportunity, you’ll see the Loss Reason in a dropdown.
How to Add a Loss Reason:
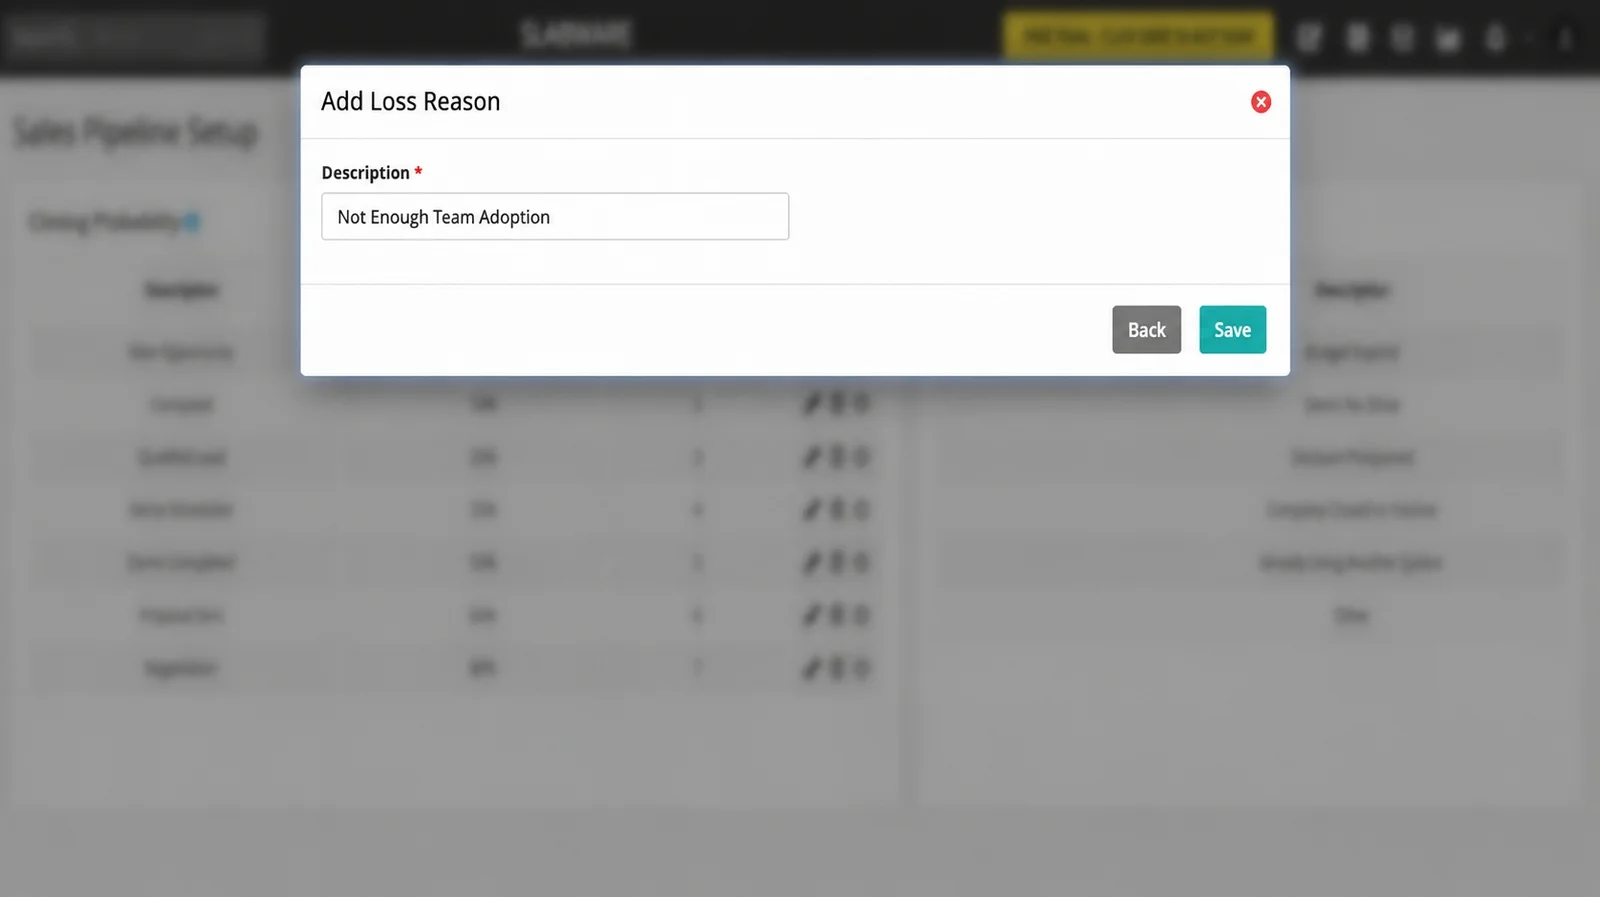
Under the Loss Reason section, click + New.
Enter the description (e.g., Not Enough Team Adoption, Price Too High, or Competitor Chosen).
Click Save.
⚠️ Best Practice: Think through your Loss Reasons in advance! Because dropdown items list in the order created, establishing your primary reasons early keeps your team's workflow fast and consistent.
📈 Step 4: Structuring Your Sales Stages
Your Sales Stages map out the actual steps a prospect takes from first touch to closed job (e.g., New Lead ➔ First Contact ➔ Follow-Up ➔ Payment Pending ➔ Won).
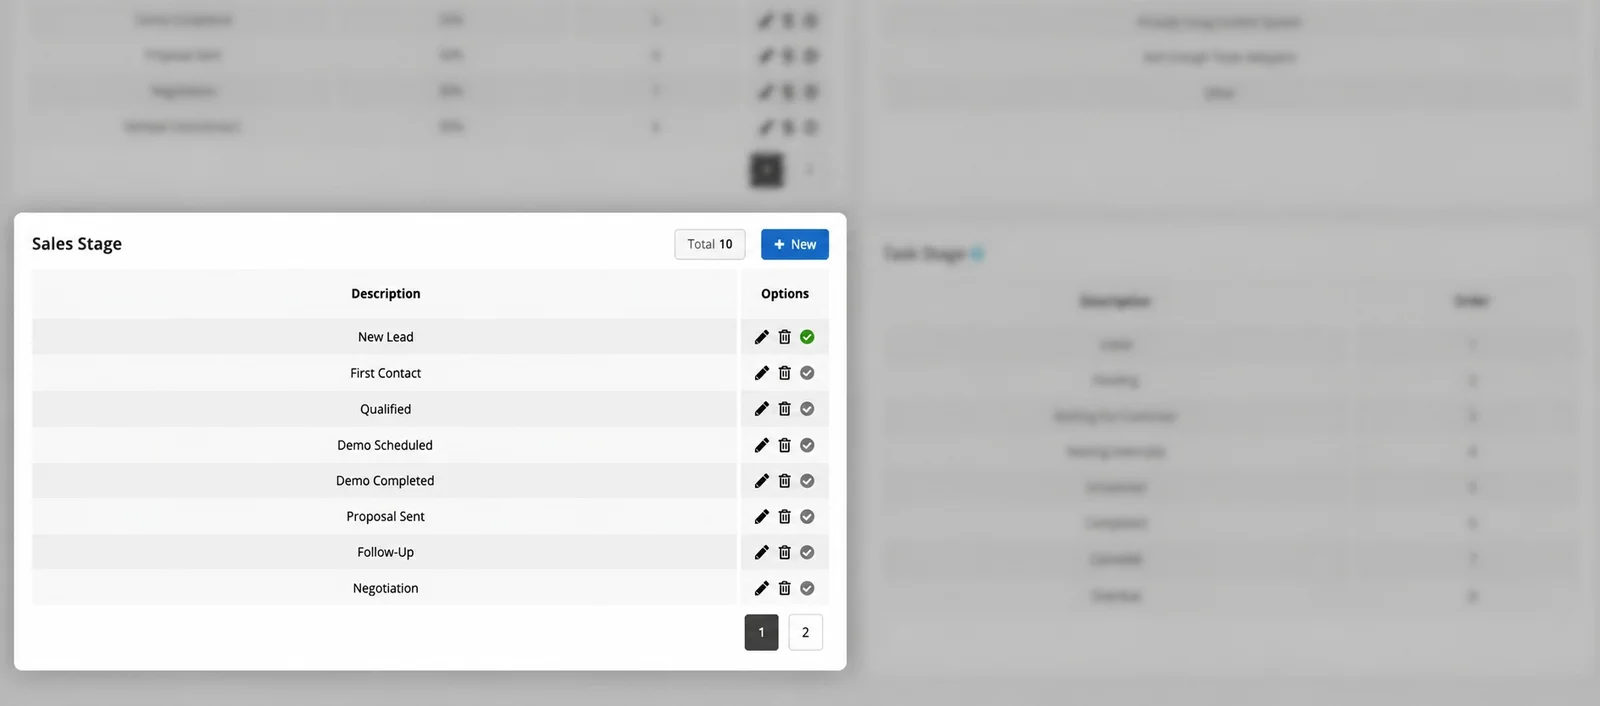
Scroll to the Sales Stage section.
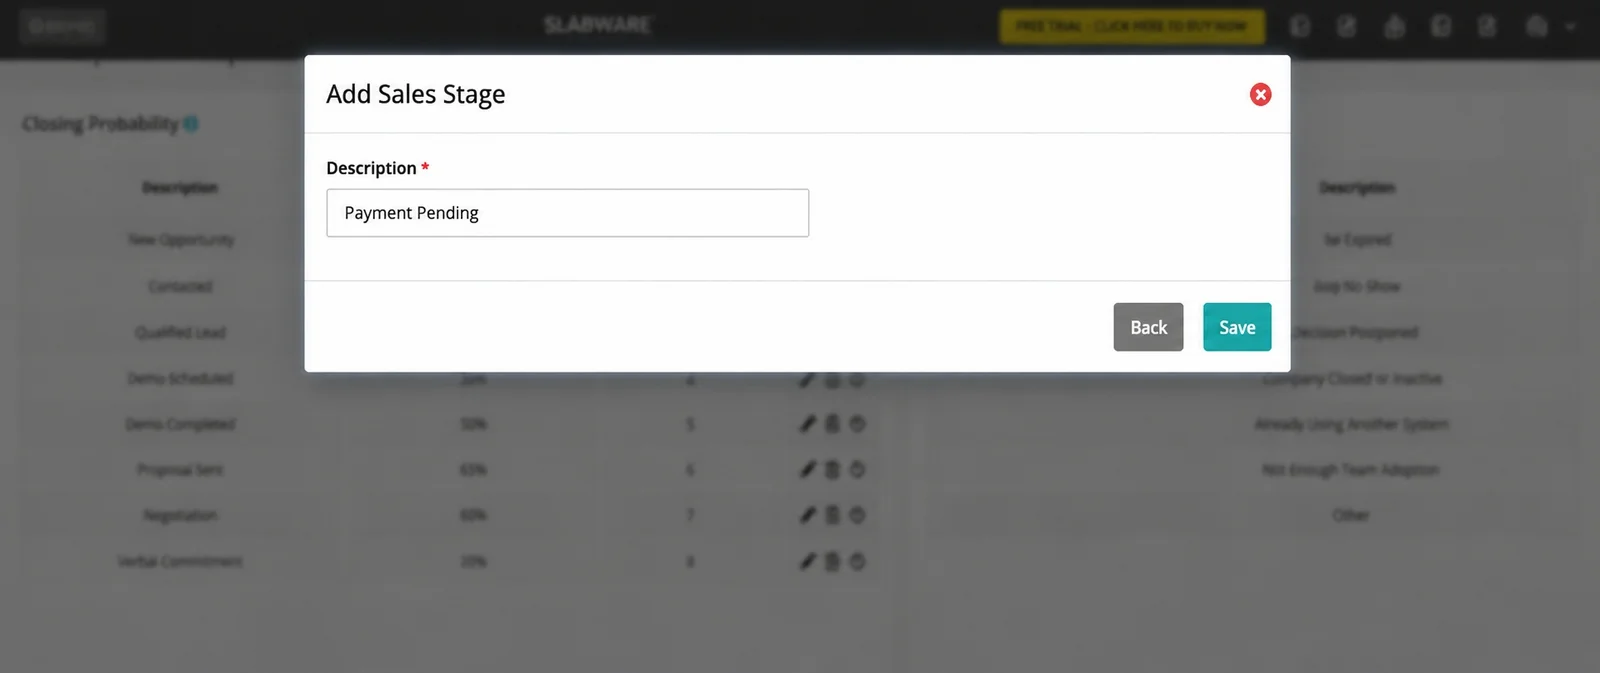
Click + New.
Type the stage name (e.g., Payment Pending).
Click Save.
Adjust the numerical order in the Sort field if you need to position it before or after other active stages.
📑 Step 5: Configuring Task Stages
Your CRM isn't just for pipeline management—it’s for daily action items.
Task Stages dictate how your team tracks calls, emails, and site visits on the Task Board (e.g., Initial, Pending, In Progress, Waiting for Customer).
Adding a Task Stage:
Go to the Task Stage section.
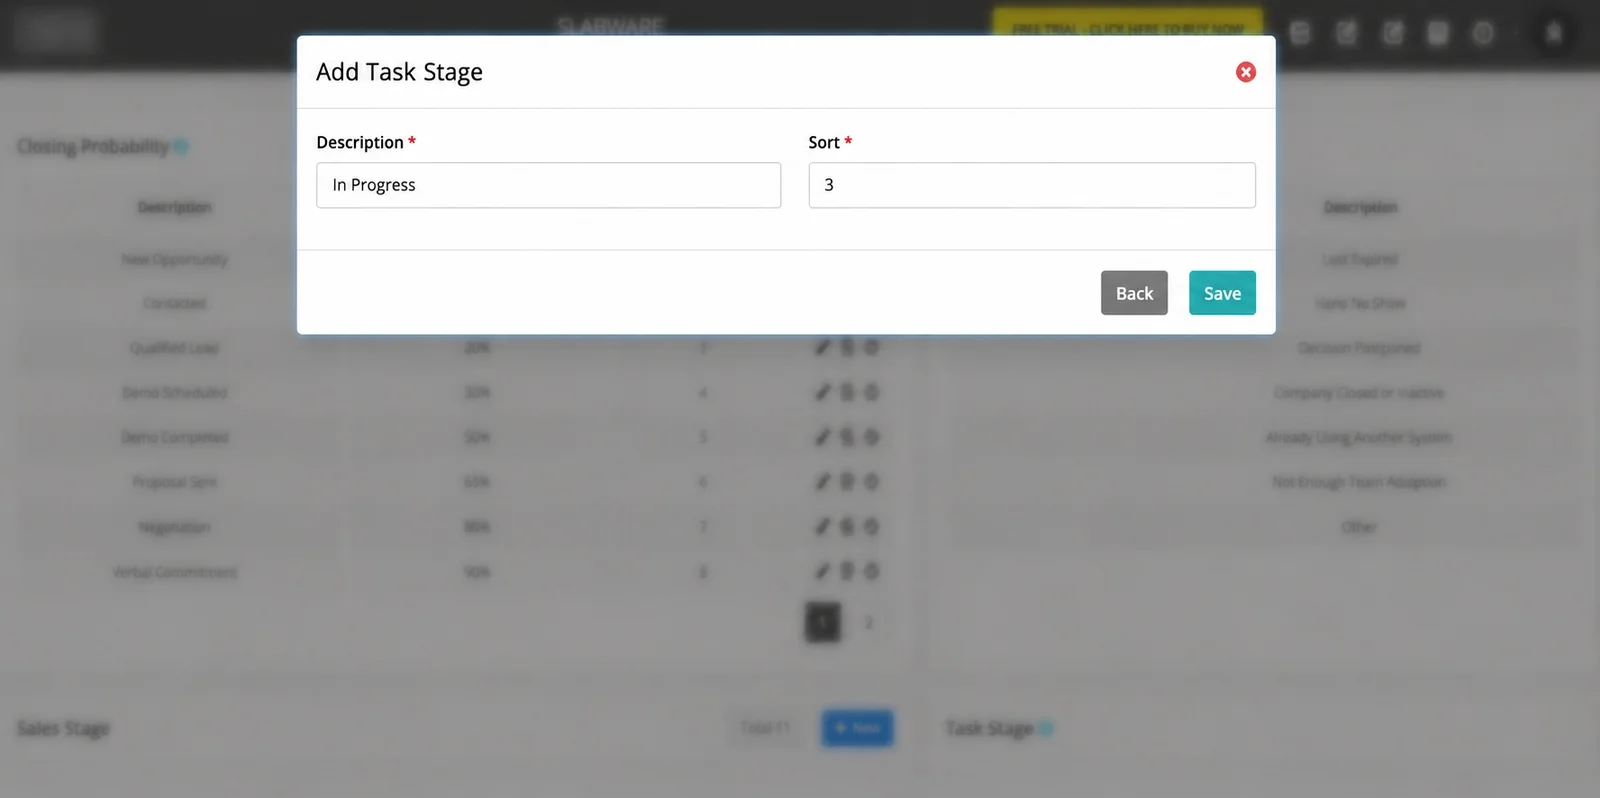
Click + New.
Name your task stage (e.g., In Progress).
Enter the Sort position where you want it on the Task Board (e.g., Position 3 to place it between Pending and Waiting for Customer).
Click Save.
🚀 You’re All Set! What’s Next?
Once your setup page is complete, your team is ready to start creating opportunities, managing task boards, scheduling site visits, and sending quotes seamlessly inside SlabWare.
If you want, you can watch this video tutorial at our YouTube channel by clicking here.
Stay tuned for our next tutorial, where we will cover the Complete CRM Workflow—showing you how to track calls, emails, meetings, and notes in real time!
Ready to Streamline Your Stone Business?
Don't let manual sales tracking slow down your shop floor. Discover how SlabWare’s specialized CRM, inventory management, and digital showroom can elevate your operation.
👉 Book a Free Demo with the SlabWare Team Today
Or check our other blog posts by clicking here.
Keep reading